Musical Score View
last modified on Mai 04, 2016
At least one perspective must be open to contain the Musical Score View. As soon as an MEI Object has been created or opened, the view will appear. In this area the musical scores that you can open from the TextGrid Repository, or create and modify with the Palette and the Outline View, will be displayed.
The encoded note text is displayed in a WYSIWYM View to display the encoding properly. All changes in the document can be made in this WYSIWYG-style. The Score View is primarily meant for the two-dimensional display of the rendering, as drag & drop operations are disabled. Elements in the note sheet should be modified with the assistance of the Editor’s Palette and the Outline and Properties View . Single elements in the Score View as notes or rests can be selected and appear in blue by left-clicking on them.
More complex interventions in the source code of an MEI document will require the XML Editor. To open the source code of an MEI Object, please use its context menu in the Navigator and choose “Open with > XML Editor”.
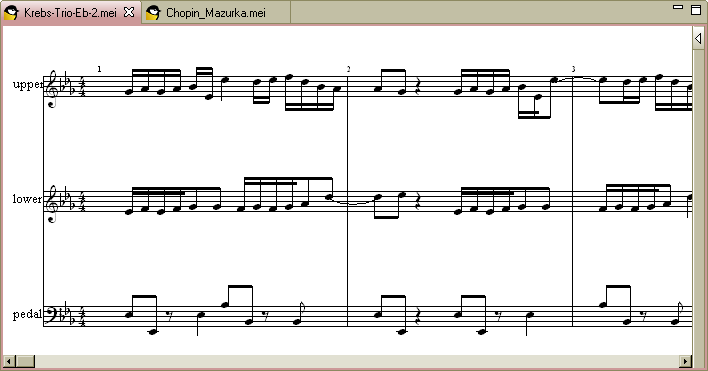
| MEISE Musical Score View |
The context menu is enabled on the Score View, but direct user manipulation via drag & drop is disabled. It offers the following options:
- Undo
 and
Redo
and
Redo  changes .
 - If single elements are selected in the Score View, they can be
deleted with
 .
. - The user can duplicate preselected elements with
"Clone"
 .
. - "Run as > Run Configurations…" opens a new window. There the user will be able to create new configurations for the launch and define the settings.
- You can validate your MEI document by clicking “Validate”.
- Use some Eclipse-specific options by selecting “Team”, “Compare With”, or “Replace With”.
- To associate an adaptor to your document, please select “Associate an Adaptor...”. An associated adaptor can translate the given documents to the TextGrid Baseline Encoding. In the new dialog box the selected file is presented with information about title, project, contributor, and creation date. You can mark the box below to make the assignment persistent when clicking “OK”. In the lower list you can select the adaptor by clicking on it. Here you can also receive additional information. To reverse your selection, you can mark the button under this list.
- To save your changes, click
 on
the bottom of the context menu.
on
the bottom of the context menu.
Attachments
- renderview.PNG (image/png)
- eclipse-icons.zip (application/zip)
- eclipse-icons.zip (application/zip)
- eclipse-icons.zip (application/zip)
- undo_edit.png (image/png)
- redo_edit.png (image/png)
- eclipse-icons.zip (application/zip)
- 042-loesche-Auswahl.gif (image/gif)
- 016-speichere-Datei.gif (image/gif)
- action-clone.png (image/png)
- mei-musicalscoreview.png (image/png)
